Development Workflow
1. Open Sailbot Workspace
Once you have set up Sailbot Workspace, you can open it by opening a new VS Code window and selecting:
File > Open Recent > /workspaces/sailbot_workspace/.devcontainer/config/sailbot_workspace (Workspace) [Dev Container: Sailbot Workspace]
Another way to open Sailbot Workspace on Windows
- Pin VS Code to the taskbar
- Right-click VS Code in the taskbar and pin
sailbot_workspace (Workspace) [Dev Container]
Then you can open Sailbot Workspace by selecting it from the "Pinned" section of the VS Code taskbar icon's right-click menu.
2. Update Sailbot Workspace
Sailbot Workspace is still in active development, check out its recent releases and commit history. If there are new features or bug fixes that you want to try, you will need to update your local version of Sailbot Workspace:
-
Switch Sailbot Workspace to the main branch if you aren't in it already
If you running Git commands in the CLI, make sure that you are in the correct repository
Sailbot Workspace contains other repositories in the
src/directory, so if you are in one of its subdirectories you may be in the wrong repository.To check which repository you are in, run
git remote -v; if its output containssailbot_workspace, you are good to go. If not, you can navigate the root directory of the Sailbot Workspace repository withcd $ROS_WORKSPACE, or open a new terminal in its root directory with Ctrl+Shift+` then Enter.- If you are unable to switch branches because you have uncommitted changes, stash them
-
Pull the latest changes
- If you stashed your uncommitted changes, pop them
-
If prompted, rebuild the Dev Container
When does the Dev Container need to be rebuilt?
To apply the modifications to its configuration files in
.devcontainer/that occurred since it was last built.VS Code will prompt you to rebuild when
devcontainer.json,Dockerfile, ordocker-compose*.yml. These file may be modified if you:- Pull the lastest changes of a branch
- Switch branches
- Update a file in
.devcontainer/yourself
However, there may be changes to the Dev Container that VS Code can't detect. To rebuild it yourself, run the
Dev Containers: Rebuild ContainerVS Code command. -
If you want to run our docs or website, see How to work with containerized applications
3. Make your changes
We make changes to our software following our GitHub development workflow. Of particular relevance is the Developing on Branches page.
Git interfaces
One way to interface with Git is through CLI commands. However, you may find it faster to use VS Code's interface, especially when working with multiple repositories.
Things to note when making changes:
- When C++ or Python files are saved, you may notice that some lines change. We use formatters to help fix lint errors; not all lint errors can be fixed by formatters, so you may have to resolve some manually
- When changing a package's source files, you likely should update its test files accordingly
4. Build your changes
In general, changes need to be built before they can be run. You can skip this step if you only modified Python source
or test files (in python_package/python_package/ or python_package/test, respectively), or are running a launch type
launch configuration.
- Depending on which packages you modified, run the
Build AllorBuild Packagetask- Unless you want to run
clang-tidy, use the-qbuild argument (default) for quicker build times
- Unless you want to run
5. Verify your changes
Running GUI applications on macOS
If you want to run GUI applications on macOS, ensure that XQuartz is running.
Lint and Test
Run lint and test tasks to make sure you changes will pass our CI:
ament lint- For C++ packages,
clang-tidy test
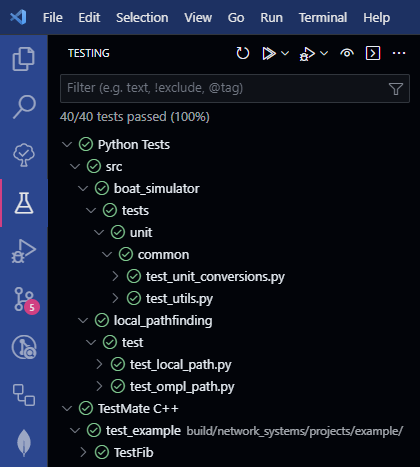
In addition to VS Code tasks, the Testing tab on the VS Code primary sidebar contains individual tests. One can run specific unit tests by clicking the Run Test icon beside the test name.
Run a Package
To verify that your changes do what you expect, you may want to run the package you modified. The run commands for each package should be documented in their READMEs, but in general they can be run using a CLI or VS Code command:
- Launch files:
ros2 launch <package> <launch file>ros2 launch <path to launch file>
- Nodes:
ros2 run <package> <executable>
CLI features
There are many commands that can be autocompleted in the terminal. Take advantage of this so that you run commands faster and memorize less syntax. If there is only one possibility, pressing tab once will complete it. If there is more than one possibility, pressing tab again will list them out.
Some tab completion use cases:
-
View available commands: lists all
ros2commands -
Complete commands: runs
ros2 launch local_pathfinding main_launch.py -
Navigate to directories: runs
cd .devcontainer/configfrom the root directory of Sailbot Workspace
Furthermore, navigate past commands with Up and Down and search through them with Ctrl+R.
- Launch files:
ROS: Run a ROS launch file (roslaunch) - Nodes:
ROS: Run a ROS executable (rosrun)
For more information on launch file use in our system, see this page.
Run the System
To verify that you didn't break anything, you may want to run the entire system. See Invoking Launch Files for more information on running the system.
Debugging
Debug your changes if they aren't behaving how you expect by setting breakpoints and running one of our launch configurations in the Run and Debug tab on the VS Code primary sidebar. The launch configuration types are:
- Launch: runs the desired launch file or executable
- For launch files,
ROS: Launch - For C++ executables,
C++ (GDB): Launch
- For launch files,
- Attach: attaches to a running executable
ROS: Attach